Audio Capture with Python
DAPL, Python, Real-Time
The 44.1k samples per second per channel rate, as used by CD and DVD audio technology, is near the theoretical limit for valid signal reconstruction of the full audio band. Doubling the sample rate to 88.2k samples per second provides a beneficial margin to facilitate later processing. Digitize multiple audio signal channels this way... and some relatively huge volumes of data can accumulate very quickly.
As it turns out, capture and delivery of this data is not particularly difficult for a DAP data acquisition system. It is the data management that is awkward. In contrast, Python shines for purposes of organizing and managing data, but it is subject to the vagaries of its host operating system: communications, file system access, screen updates, object reclamation, you name it. Working in parallel, DAP systems and Python systems can form an unexpectedly effective partnership, with the on-board DAPL system taking care of the time-critical matters, and with the Python system free to do its varied processing on its own terms. For the special case of audio data, Python directly supports the WAV file format (WAVE files) as one of its "standard library" features.[1] Recorded WAV files can then be imported by numerous other software systems such as MATLAB[2] (for analysis), or Audacity[3] (for signal editing and manipulation).
With the aid of a PhD candidate and a few thousand dollars, you could easily arrange to do the same kinds of things in an elegant and full-featured GUI test environment. However, there are other times when all of that overhead gets in the way, and all you really need to do is "grab some data and run with it". Most of the time, Python is well suited for the "grab and go" kinds of applications. We will consider how a combination of DAPL and Python processing can implement a minimal high-rate, multi-channel audio capture application that makes no compromise on data quality.
Basic Information
For the case of audio capture, at a minimum, you need the following information for each data collection run.
| Which python script to run | Specify this as the Python system is started. |
| What DAPL system configuration to use | Specify this as the Python system is started or by prompt. |
| Output file name | Specify this as the Python system is started or by prompt. |
| Number of channels | Verify consistency in DAPL and Python scripts |
| Sample rate | Verify consistency in DAPL and Python scripts |
| Time duration (number of samples to capture) | Verify consistency in DAPL and Python scripts |
Python Command Line and Parameters
Part of the configuration information can be provided to the Python application when it starts. A command line for the application can look like the following.
python getwave.py <-d dapfile> <-w wavefile>
The
pythoncommand starts the Python system with a command window display that can be used to display diagnostic and status messages for the course of the application run. A more refined application might use thepythonwcommand instead, and dispense with the text displays.The
getwave.pyscript is the main application script run by Python, to coordinate the DAP board and host processing.The optional
dapfileparameter specifies the DAPL system configuration script file to be passed to the DAP board. If unspecified, the application must prompt for it.The optional
wavefileparameter specifies the output file to receive the data in WAV file format. If unspecified, the application must prompt for it.
We will see in a moment where the Python script picks up command line information.
The DAPL configuration script
The DAPL configuration commands must be sent to the DAP board to tell it what to do: how fast to sample, which channels to use, what to do with the data. These commands are best organized separately and placed in a text file. Start by clearing out any prior configuration elements that might happen to be present in the DAP board memory.
  // The getwave.dap configuration file for the DAP board
  RESET
The sampling section configures the hardware management process for data capture. Four channels are configured. The input sampling captures data in groups of 4 channels, one value from each input signal. The sampling will continue until the Python application stops taking data and tells the DAP board to stop.
  // Configure the input sampling: 4 channels, select signal pins, set sampling interval.
  // Sample interval (DAP 5216a): 4 chan x 88.2ksamp/sec -> 2.85 microseconds/samp
  IDEFINE getaudio
    CHANNELS  4
    SET    IPipe0   S0
    SET    IPipe1   S2
    SET    IPipe2   S4
    SET    IPipe3   S6
    TIME   2.85
  END
Next, define the data processing. In this case, all digitized data are sent in raw form to the host.
  PDEFINE sendraw
    // Transfer raw digitized data to host, in groups of 4 samples.
    COPY(IPipe(0..3), $BinOut)
  END
That's all of the required configuration, but the application does not need to wait for anything else before applying this script. So one final "executable" line can be added at the end to begin immediate DAP activity.
START
Save all of the command lines in the getwave.dap file, and put that file where the Python application can find it.
Python: Command Line Options
If there is full information on the command line, there is no need for any supplemental user interaction. However, suppose that the Python command line looks like the following.
python getwave.py -dgetwave.dap
This is a useful strategy when the output WAV file must be adjusted for each run so that previous data are not overwritten. In this case, the Python script prompts for each output file. The Python library getopt (part of the "standard library") is used to assist with processing the command line options.
import sys
import getopt

opts, args = getopt.getopt(sys.argv[1:],'d:w:')
daplfile = ""
wavefile = ""
for  opt,val in opts :
  if  opt=="-d" :
    daplfile = val
  if  opt=="-w" :
    wavefile = val
Minimalist prompts
If options are not specified on the command line, then the corresponding daplfile or wavefile variables will be empty after the options processing, and something must be done to identify these file paths before the processing can continue.
A full GUI application can prompt for this information in a really elegant way, providing a convenient single layout "panel" where all of the relevant parameters can be displayed and adjusted as necessary. Control widgets such as start and stop buttons, progress displays, and so forth, can be provided to facilitate execution.
All of that comes at a price, however. The host system can't predict which of the various controls and sub-widgets might be used at any given time, so activities are coordinated by clusters of "event handler" functions invoked by some kind of "event loop", to which you must relinquish control — and that can lead to some serious challenges when also trying to cope with an intense influx of digitized data. In general, this level of sophistication is beyond the scope of minimalist software — and beyond the scope of this article.
Fortunately, a minimalist application can usually take advantage of a less flexible but much simpler approach. The "GUI application" is reduced to a sequence of transient "dialog boxes", each covering one small aspect. This doesn't eliminate the need for an "event handler", but the "handler" becomes small enough to hide within each dialog widget, so you don't have to think about it. When activity finishes, the hidden loop exits and the dialog returns a value in much the same way as a regular function. The Easy GUI library[4] implements this scheme. This can be used as follows to prompt for DAPL script and output files as needed.
import easygui

if  daplfile=="" :
  daplfile = easygui.fileopenbox(msg=None, title="Select DAPL script file", default='./waveget.dap')

if  wavefile=="" :
  wavefile = easygui.filesavebox(msg=None, title="Select WAV output file", default='./waveget.wav')
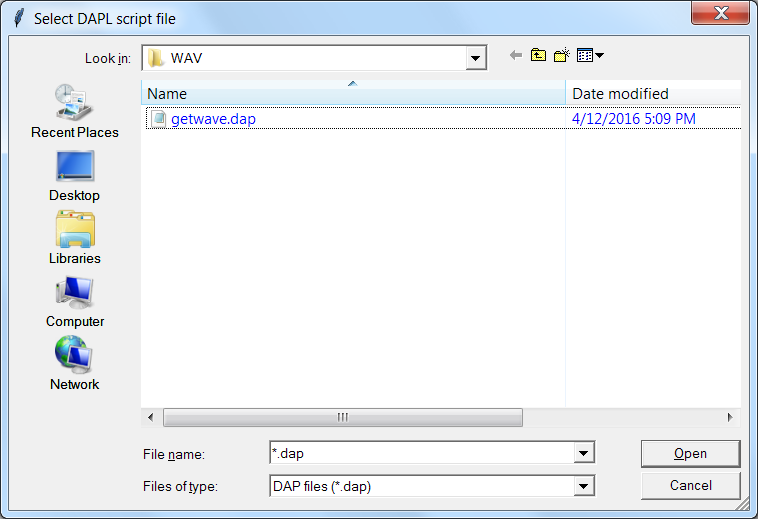
Here is an example of a prompt from EasyGUI for a DAPL script file.
Initializing the output data file
To prepare Python for writing data to a WAV file, the output is routed to a WAV file formatter object rather than a normal binary file. A little extra setup is required for this.
import  wave

try:
  wvobj =  wave.open(wavefile,'wb')
except OSError :
  print('Output WAVE file error')
Transfers from the DAP are "in data units" of 16-bit samples, while the WAV file accounts for data "in frames". A data transfer of 4000 values per block corresponds to 1000 "frames" of 4 samples, with each sample value 2 bytes long. Some calculations are performed to establish the right configuration parameters for the WAVE file.
bytes_per_sample = 2
channels = 4
frames_per_block = 1000;
values_per_block = frames_per_block * channels
frames_per_sec = 88200
duration = 10.0
maxframes = round(frames_per_sec * duration)
The configuration values just calculated are now inserted into the header of the WAVE output file.
# The number of channels recorded
wvobj.setnchannels(channels)

# The data size for 16-bit samples (2 bytes)
wvobj.setsampwidth(bytes_per_sample)

# Sample rate per channel (frames per second))
wvobj.setframerate(frames_per_sec)

# Terminate recording at end of recording interval
wvobj.setnframes(maxframes)
Operating the DAP board
Everything is ready. It is time for the Python script to activate DAP processing. As soon as the configuration is complete, the DAP immediately begins capturing the data.
# Establish connections and configure the DAP board
# Handle exceptions if DAP connection fails
from dapio import *
from daphandle import *
from dapblock import *

try:
  dhandles = Open1Dap( daplfile )
except DapException as err :
  wvobj.close()
  print(err.errmsg)
Things are now happening very fast in the background, as returned audio signal samples are captured and delivered to the Python application. The data are written until the application has finished.
framecount = 0
while framecount < maxframes :
  result, storage =  GetDAPBLock( dhandles[BinOut], values_per_block, 'h')
  framecount = framecount + frames_per_block
  print('Frames written: ',framecount)
  wvobj.writeframesraw(storage)
Final Cleanup
The WAV file and the DAP connection always need to be closed at the end of the run, to prevent unexpected spurious effects later.
Close1Dap(dhandles);
wvobj.close()
Some Concluding Comments
The DAPL configuration contains 13 script lines, including the command to
STARTthe processing. The Python script contains 49 lines. This is remarkably compact, considering everything the script is able to accomplish — yet there is little to grieve about if you discard it all at the end of the day, after the mission is completed.Since the Python environment does not modify any data, only moves and manages it, the measurement results you get are technically as good as you can get by any other means.
If you must relate the data sets to time-dependent activity from other sources (such as various MIDI or multi-track recording devices), you will need to use external hardware-controlled clocking with this application, to keep all signal channels synchronized. For a quick overview, see the list of DAPL input configuration commands. Check the DAPL Reference manual for detailed information.
If you find that your application has continued value, it might be worth your time to retain and improve it. The numpy[5] library provides facilities for some relatively advanced numerical processing, so that you can automate your analysis. The matplot[6] library provides interesting facilities for graphical data displays. Replacing the EasyGui dialogs with a full TkInter[7] graphical application front-end could make the application easier to use.
See also: DAPtools for Python
### Footnotes ###
[1] Chapter 22.4. wave — Read and write WAV files in the Python 3.4 "standard library" documentation. [ back ]
[2] MATLAB, from Mathworks. [ back ]
[3] The Audacity, available at SourceForge. [ back ]
[4] EasyGUI v0.96, available at SourceForge. [ back ]
[5] numpy library, at NumPy.org [ back ]
[6] matplotlib, at matplotlib.org [ back ]
[7] TkInter is almost always include with the Python installation. [ back ]
Return to the Software Techniques page.